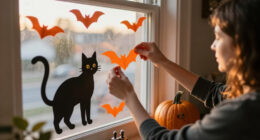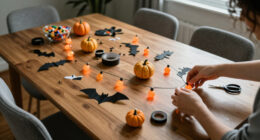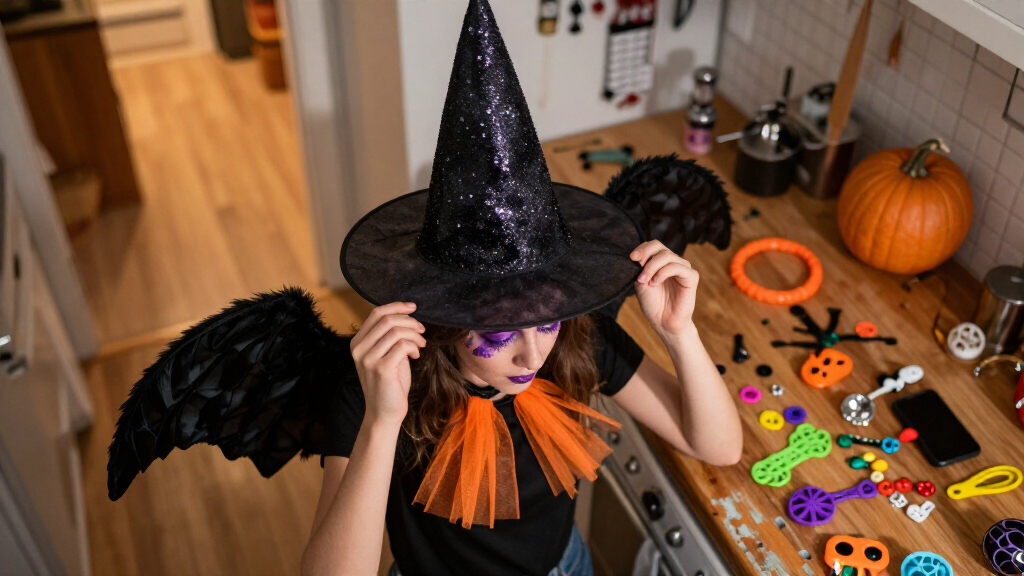

This guide shows you how to build the accessory set for a Halloween costume: the hat, props, jewelry, makeup touches, and carrying pieces that turn a basic outfit into a recognizable character. You will decide which accessories your costume actually needs, source them without overspending, fit and secure them properly, and test the whole set before you wear it out. This guide is for anyone assembling accessories for themselves or a child, whether you are buying pieces, making them, or combining both. No sewing or crafting expertise is required. Expect the planning and assembly work to take two to four hours, plus whatever time you spend shopping. Done correctly, you will end up with a complete accessory kit that looks intentional, stays attached, and survives a full evening of parties or trick-or-treating.

Get your next haul delivered free with Prime
- Fast, free delivery on millions of items
- Prime Video, Amazon Music and more included
- Member-only deals all year
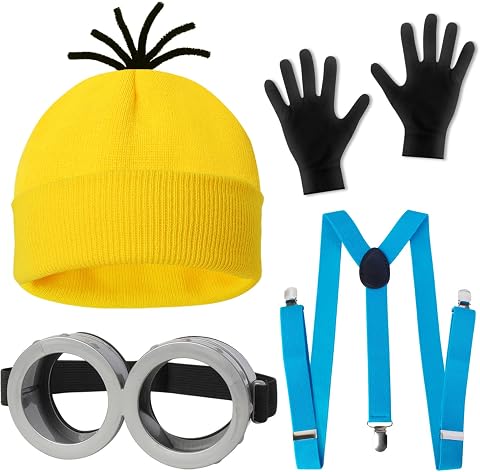
CONGRU 4-Piece Halloween Costume Set for Adults (Yellow Hat, Goggles, Gloves, Suspenders)
- ✔ Included pieces: Yellow beanie, suspenders, goggles, black gloves
- ✔ Fabric type: Polyester
- ✔ Materials: Polyester, plastic, foam

CICOCI Pirate Costume Accessories Set for Adults
- ✔ Included components: Bandana, sash, bracelet, necklace, eye patch, earring
- ✔ Materials: Linen and cotton
- ✔ Bandana size: Approximately 47 × 47 × 57 in (120 × 120 × 145 cm)

SHELYEXIEN Halloween Temporary Eye Tattoos, 7 Sheets
- ✔ Quantity: 7 sheets
- ✔ Designs: Cats, skulls, bats, spider webs, and other horror motifs
- ✔ Application: Water transfer
Difficulty: Beginner | Time: 2-4 hours (plus shopping time)
What You’ll Need
Tools & Materials:
- Base costume (the clothing piece your accessories attach to)
- Measuring tape
- Scissors and a hot glue gun or fabric glue (for handmade pieces)
- Elastic bands, bobby pins, hair clips, and safety pins
- Spirit gum, double-sided body tape, or medical tape for securing pieces to skin
- A full-length mirror
- A box or bag to store the finished accessory kit
Knowledge:
- A clear idea of the character or costume concept
- Basic familiarity with your own measurements (head circumference, waist)
- Awareness of any skin sensitivities or allergies to adhesives and makeup
Decide before you shop whether you are buying accessories, making them, or mixing both. Buying is faster; making is cheaper and looks more distinctive. Also check the weather forecast for Halloween night if you will be outdoors — an outdoor costume in cold weather needs different accessories (gloves, warm cloak) than an indoor party version.
CONGRU 4-Piece Halloween Costume Set for Adults (Yellow Hat, Goggles, Gloves, Suspenders)
When we want a Halloween look to come together with minimal wardrobe planning, CONGRU is the most direct option in this lineup. Its yellow beanie, goggles, black gloves, and suspenders supply several recognizable visual cues at once, and the suggested pairing with a T-shirt and jeans keeps the rest of the outfit simple. Compared with the CICOCI pirate set, it is less about assembling a range of themed accessories and more about landing on one coherent character style.The one-size-fits-most description and stretchy materials may make it convenient to share or adapt, but that flexibility has limits: the supplied details specifically caution that it may not fit very large individuals. The plastic goggles are another compromise, since they may be less durable than the fabric pieces in the pirate set. For buyers seeking a fast, coordinated costume foundation, those drawbacks may be acceptable; anyone who needs a more precise fit or sturdier eyewear should look elsewhere. Its strength is instant coordination, not broad styling range.
Pros:
- Four coordinated pieces create a recognizable look
- Pairs easily with a T-shirt and jeans
- Stretchy materials and adjustable straps help with fit
- One-size design may suit a range of adults and kids
Cons:
- One size may not fit very large individuals
- Plastic goggles may be less durable
Best for: Adults or families who want a recognizable costume starter they can pair with a basic T-shirt and jeans.
Not ideal for: Buyers who need a roomy, size-specific fit, durable goggles, or accessories that can be styled across several costume themes.
Bottom line: We recommend CONGRU for the simplest path to a coordinated Halloween costume, provided its one-size fit and plastic goggles suit our needs.
“We recommend CONGRU for the simplest path to a coordinated Halloween costume, provided its one-size fit and plastic goggles suit our needs.”
CICOCI Pirate Costume Accessories Set for Adults
CICOCI gives us the broadest themed accessory assortment: a bandana and large sash set the silhouette, while the bracelet, necklace, eye patch, and earring add smaller details. That makes it a stronger match than CONGRU when we already have pirate-style clothing or want to build the outfit around a specific theme. Its linen and cotton bandana and sash also offer a fabric-led alternative to the CONGRU set’s plastic goggles and foam components.More pieces do not automatically mean a simpler fit. The listed bandana and sash measurements are substantial, so we should check them against our preferred styling before ordering; the dimensions may affect how the pieces wrap or drape. The set is for adults, and it includes only one earring, which can be an awkward detail if we expect a matching pair. Unlike the SHELYEXIEN tattoos, these accessories create a visible pirate costume from clothing outward, but they are less useful when we want small Halloween accents that work across unrelated looks. Choose it for theme and variety, with room to plan the fabric pieces.
Pros:
- Six pieces support a coordinated pirate look
- Bandana and sash use linen and cotton
- Lightweight fabric is described as comfortable
- Suitable for parties, cosplay, Halloween, and performances
Cons:
- Bandana and sash dimensions may need checking
- Only one earring is included
Best for: Adults assembling a pirate costume who want several coordinated accessories to pair with clothing they already own.
Not ideal for: Shoppers who want a ready-to-wear outfit, a matched pair of earrings, or accessories without checking fabric dimensions.
Bottom line: We favor CICOCI when a pirate theme matters more than instant outfit simplicity, as long as the fabric dimensions and single earring fit our plans.
“We favor CICOCI when a pirate theme matters more than instant outfit simplicity, as long as the fabric dimensions and single earring fit our plans.”
SHELYEXIEN Halloween Temporary Eye Tattoos, 7 Sheets
For buyers who already have the costume and want to add a Halloween motif, SHELYEXIEN offers the most flexible styling approach. Seven sheets feature designs such as cats, skulls, bats, and spider webs, so we can choose details for the face or body rather than committing to a hat-and-suspenders look or a full pirate theme. Compared with CICOCI’s wearable pieces, tattoos take up less space and can decorate a costume without changing its clothing or accessories.The tradeoff is that these sheets finish an outfit rather than build one. Application is described as a quick water transfer, around 10–20 seconds, and removal can be done with alcohol or body oil; the listed wear time is 3–5 days. But we are not told how many tattoos each sheet contains or how large they are, which makes it harder to plan coverage than with either accessory set. These are a useful pick for personalizing an existing costume, but they are the least complete choice if our goal is to create a look from scratch. Think of them as a detail layer, not a costume kit.
Pros:
- Seven sheets include varied Halloween motifs
- Water-transfer application is described as taking about 10–20 seconds
- Designs can be used on the face and body
- Can be removed with alcohol or body oil
Cons:
- Listed wear time is 3–5 days
- Number and size of tattoos per sheet are unspecified
Best for: Costume owners who want Halloween designs on the face or body without adding conventional wearable accessories.
Not ideal for: Anyone building a full costume from accessories or needing a clearly specified tattoo count and design size.
Bottom line: We choose SHELYEXIEN for temporary Halloween detailing on an outfit we already own, while recognizing it contributes less to costume completeness than the other sets.
“We choose SHELYEXIEN for temporary Halloween detailing on an outfit we already own, while recognizing it contributes less to costume completeness than the other sets.”
As an Amazon Associate we earn from qualifying purchases.
Before You Start
Write down your character reference before buying anything. Find two or three photos of the character or costume style and list every visible accessory: hat, glasses, weapon, jewelry, shoes, belt, gloves. Rank them in two groups — items the costume cannot be recognized without, and items that are nice-to-have extras. Most costumes need only three to five accessories to read clearly; more than that gets expensive and uncomfortable. This list becomes your shopping list and your limit against impulse buys.
If the costume is for a child, involve them in the ranking step so the accessories they care most about make the cut, and check any prop weapons against your school or event’s rules before purchasing — many venues prohibit realistic-looking weapons regardless of material.
Step-by-Step Instructions
Step 1: List and rank the accessories your costume requires
Spread out your reference photos and write each visible accessory on a separate line. Label each item essential (the costume fails without it) or optional (it improves the look but is not required). For example, mark a witch’s hat and broom as essentials; mark green face paint, a cape, and a cauldron purse as optional. Circle the top three to five items total to finalize your build list.
Tip: If an accessory is hard to find or expensive and it is marked optional, cut it now rather than hunting for it later.
Check: You have a written list of three to five accessories, each marked essential or optional.
Step 2: Measure yourself and check sizing before buying
Wrap the measuring tape around your head to size hats and headbands, around your wrist to size gloves and bracelets, and around your waist or hips to size belts and holsters. Record each measurement next to the matching item on your list. Compare your recorded numbers to the size chart of any product before ordering — never assume a one-size-fits-all item will fit, especially hats and gloves.
Tip: For children’s accessories, size up slightly rather than down; a slightly loose hat can be pinned or padded, but a tight one causes headaches and gets abandoned.
Check: Every item on your list has a recorded measurement or a confirmed size to order.
Step 3: Source or make each accessory
Collect your items using the fastest reliable route for each piece. Search costume shops, thrift stores, craft stores, and online marketplaces, and compare prices against what you can build in under an hour with materials you already own. Construct simple items like a belt pouch, paper crown, cardboard wand, or foam armor pieces yourself when they are cheaper and faster to make than to ship. Buy or build only the items on your ranked list — add nothing else to the cart.
Tip: Thrift stores frequently have character-defining pieces (leather jackets, canes, costume jewelry) for a fraction of costume-shop prices. Check the toy aisle and the formalwear section first.
Check: Every item on your list exists physically in front of you, either purchased or built.
Step 4: Fit each accessory and adjust it for wear
Try on each accessory one at a time in front of the mirror. Shake your head to confirm hats sit level and stay on; tighten loose hats with foam tape or an elastic chin strap. Walk across the room to confirm belts and holsters do not slide — punch extra holes with a skewer or sharp scissors if needed. Grip a cup and open a door to confirm gloves allow normal hand use. Fix or exchange anything that fails these tests now, while there is still time to return or repair it.
Tip: Take photos of each accessory worn from the front and side. Fitting problems that are invisible in the mirror show up clearly in photos.
Check: Each accessory stays in place through a head shake, a walk across the room, and a hand movement test.
Attach anything that could fall off, snag, or be grabbed. Anchor headpieces with bobby pins matched to your hair color, criss-crossed to resist pulling. Pin capes, sashes, and hanging props with safety pins placed inside the clothing, pushing each pin through a structural seam rather than the fabric face. Glue or tape skin-sitting pieces with spirit gum or double-sided body tape after testing a small patch of skin for a reaction. Position every fastener where the mirror shows it is hidden.
Tip: Capes and long scarves are the most common trip and snag hazards. Pin them up at the shoulder so the hem stays above ankle level, especially for children.
Check: You can jump, spin, and duck without any accessory shifting, and no fastener is visible from the front.
Step 6: Do a full dress rehearsal
Put on the complete costume with every accessory attached, wearing the shoes you will actually wear. Walk around your home for ten minutes. Sit down and stand up. Hold a drink, use your phone, and climb stairs. Write down anything that falls off, pinches, blocks your vision, or overheats. Fix each issue immediately, then repeat the specific movement that failed to confirm the repair holds.
Tip: Do this rehearsal several days before Halloween, not the afternoon of. Repairs and replacements need shopping time.
Check: You complete ten minutes of normal movement with zero adjustments needed and can see, breathe, and move freely.
Step 7: Pack and store the accessory kit
Lay out all accessories and pack them into a single box or bag in wearing order: place base pieces at the bottom and delicate or fragile items on top wrapped in tissue or a plastic bag. Tuck your fasteners — pins, tape, spirit gum, and a small pair of scissors — into a zippered pocket or side pouch. Store the kit somewhere dry at room temperature, away from anything that could crush it.
Tip: Photograph the finished complete costume before packing it. The photo doubles as a re-assembly reference if you take the costume apart before the event.
Check: The entire accessory kit fits in one container, fasteners included, and you have a reference photo of the finished look.
Common Mistakes to Avoid
- Buying accessories before listing what the costume actually needs, leading to a drawer of unused props and a missing essential piece. — Complete the ranked written list in step one before opening a single store page or entering a shop.
- Assuming one-size-fits-all accessories will fit, especially hats, which then slip or pinch all night. — Measure head, wrist, and waist first and compare against size charts; buy adjustable versions whenever available.
- Skipping the dress rehearsal and discovering on Halloween night that the cape trips you or the mask blocks peripheral vision. — Schedule the ten-minute movement test several days early and treat any failure as a must-fix item.
- Using rigid fasteners like staples or stiff wire on pieces worn near the face or by children. — Use only bobby pins, safety pins, fabric tape, and spirit gum, and round off or tape over any sharp edges on handmade props.
Troubleshooting
Problem: A hat or headpiece keeps slipping off during wear.
Solution: Add self-adhesive foam strips inside the hat band to build out the fit, then anchor with two criss-crossed bobby pins through the band into your hair. For heavy headpieces, add a clear elastic chin strap.
Problem: An essential accessory is sold out or too expensive.
Solution: Build a substitute from craft foam, cardboard, and paint — search the item name plus ‘DIY’ for a pattern. Most iconic props (wands, badges, crowns, axes) can be made in under an hour and look better painted than the cheap molded versions.
Problem: Spirit gum or tape irritates your skin during the rehearsal.
Solution: Remove it immediately with the proper remover or warm soapy water, wash the area, and switch to a fabric-based attachment method: pin the piece to a headband or hat instead of skin, or use a hypoallergenic medical tape rated for sensitive skin.
Problem: A prop weapon or large accessory is banned at your event venue.
Solution: Replace it with a scaled-down foam or cardboard version, or retrofit the original: remove any rigid core, round the edges, and attach it permanently to a belt or back mount so it reads as decoration rather than a usable prop. Call the venue if you are unsure of the rule.
What Success Looks Like
Your accessory set is complete when all of the following are true. Every item from your ranked list is in hand and fits without pinching or sliding. The full costume passes the ten-minute movement test — walking, sitting, stairs, holding a drink — with no accessory shifting or falling. No fasteners are visible from the front, and nothing sharp touches skin. A child wearing the costume can put it on and take it off without help if it is for school or trick-or-treating. Finally, the whole kit lives in one container with spare pins and tape packed alongside it, and you have a reference photo of the finished look. If you can check every one of these boxes, the costume is event-ready.
Next Steps
On the day, get dressed early enough to attach skin-secured pieces with good lighting and a mirror — allow twenty minutes for full assembly. Pack a small emergency pouch to carry with you: five safety pins, bobby pins, a travel tape roll, and blotting tissues for makeup. After the event, wipe down props, untangle and wrap cords and straps, and return everything to the same container so next year’s build starts from an organized base. Reusable pieces like hats, capes, and belts store well in a cool, dry closet and can anchor a different costume next year — photograph and label the box so you remember what you own. If you built handmade props, note what adhesive or paint held up and what failed, so the next build is faster.
Frequently Asked Questions
How many accessories does a costume actually need?
Most costumes read clearly with three to five accessories, and typically no more than two of them large. One signature piece — the hat, weapon, or wig that identifies the character — does most of the work, with the rest supporting it. Beyond five items, cost and discomfort rise faster than recognizability.
Is it cheaper to buy or make costume accessories?
Simple flat or sculpted items (crowns, wands, badges, armor plates) are almost always cheaper to make from craft foam and cardboard. Structured or wearable items that need precise fit (wigs, gloves, realistic props) are usually cheaper to buy, since making them well requires materials and time that exceed the store price.
How do I keep a wig or hat on a child all night?
Anchor the wig with at least six bobby pins around the hairline, twisted inward, and put a fitted hat over a wig cap rather than directly on the wig fibers. Test with a vigorous head shake during the rehearsal — if it survives that, it will survive trick-or-treating.
What accessories are usually banned at schools and parties?
Realistic-looking weapons of any material, hard plastic props with pointed ends, full-face masks at many schools, and accessories long enough to tangle (ropes, tails dragging on the ground). Check with the venue in advance and bring soft foam replacements where needed.
How far in advance should I assemble accessories?
Start two to three weeks before Halloween. This leaves time for shipping on ordered items, one exchange cycle for sizing problems, and a dress rehearsal at least four days before the event so anything that fails can still be repaired or replaced.
Halloween Picks
halloween
As an affiliate, we earn on qualifying purchases.