To extend your garment’s life through DIY repairs, start by evaluating and preparing your clothing—check for tears, loose threads, or stains. Use basic sewing techniques like straight and zigzag stitches to fix holes, reinforce seams, or attach new buttons. For quick fixes, apply fabric glue or iron-on patches. Take care of repairs with gentle washing and proper maintenance. Keep exploring to discover more tips for keeping your wardrobe fresh and durable.
Key Takeaways
- Assess and clean garments thoroughly before repairing to ensure a proper surface for effective fixes.
- Master basic sewing techniques like straight and zigzag stitches to reinforce and extend fabric durability.
- Use patches, fabric glue, or iron-on repairs for small holes or frayed edges to prevent further damage.
- Reinforce seams and replace missing buttons or zippers promptly to maintain garment functionality.
- Follow proper care practices post-repair, such as gentle washing and air drying, to prolong the longevity of repairs.
Amazon Product B0FSRCHFCM
As an affiliate, we earn on qualifying purchases.
Assessing and Preparing Your Garments for Repair
Before you begin repairing your garment, it is vital to carefully assess its condition and prepare it properly. Start by examining the fabric closely to identify all areas needing attention, including tears, loose threads, or stains. Check for hidden damage that might worsen if not addressed early. Remove any dirt or debris by gently washing or brushing the garment, ensuring a clean surface for repairs. Turn the clothing inside out to inspect seams, linings, and hidden tears. Gather all necessary tools and supplies, such as needles, thread, scissors, and patches, so you’re ready to work efficiently. Proper assessment and preparation save you time and help prevent mistakes, making your repair process smoother and more effective. Additionally, understanding the material durability of your garment can guide you in choosing the most appropriate repair techniques, especially since different fabrics respond differently to wear and tear. Recognizing signs of fabric weakening and moisture levels can also help determine whether a repair will extend the garment’s lifespan or if replacement might be a better option. Being aware of automation in business can also inspire you to streamline your repair process with creative solutions, saving time and effort.
Amazon Product B0CR1CM8JK
As an affiliate, we earn on qualifying purchases.
Basic Sewing Techniques Every DIYer Should Know
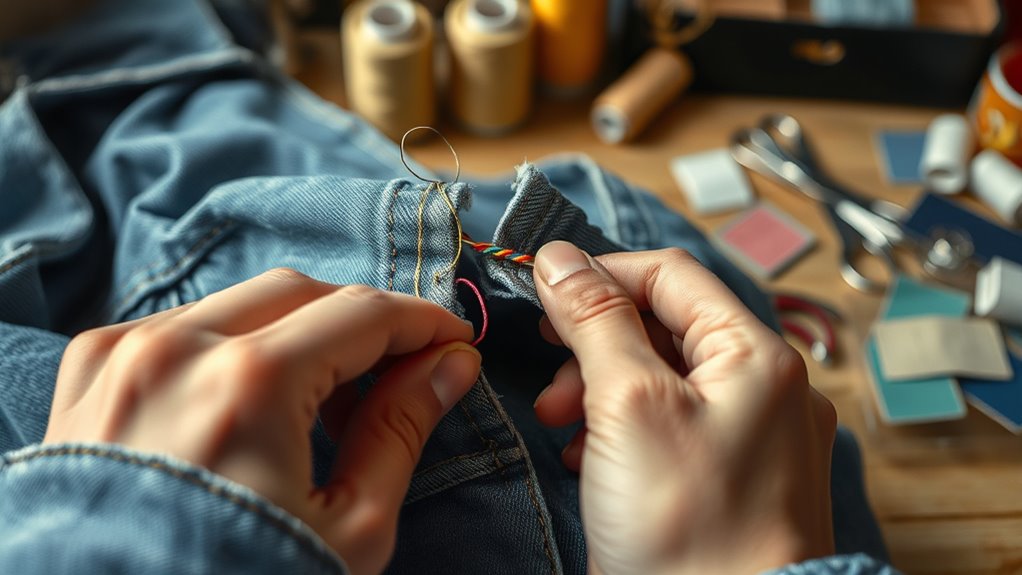
Mastering basic sewing techniques is essential for any DIY clothing repair, as they form the foundation for durable and neat fixes. Knowing how to sew a straight stitch guarantees your repairs stay secure, while backstitching helps reinforce seams that experience stress. A zigzag stitch prevents fraying along raw edges, increasing your garment’s lifespan. Threading your needle correctly and maintaining proper tension assure your stitches even and professional-looking. Practice sewing small seams and hems to improve your control and precision. Using pins or clips keeps fabric aligned, making certain your repairs are neat. Preppy dog names can serve as inspiration for choosing a fun and unique name for your repaired garment or sewing project, adding a personal touch. Additionally, understanding different materials used in sewing can help you choose the best tools and techniques for each repair, ensuring longevity and a polished finish. Exploring sewing machine types can help you select the most suitable equipment for your projects, enhancing your skills. Incorporating visualization techniques from personal development principles can also boost your confidence and focus during sewing projects. Practicing these techniques regularly helps you build sewing skills that will make your repairs more professional-looking and durable. By mastering these fundamental techniques, you’ll be able to handle most minor repairs confidently, saving money and extending the life of your clothes with professional-quality results.
Amazon Product B0FJRLM79S
As an affiliate, we earn on qualifying purchases.
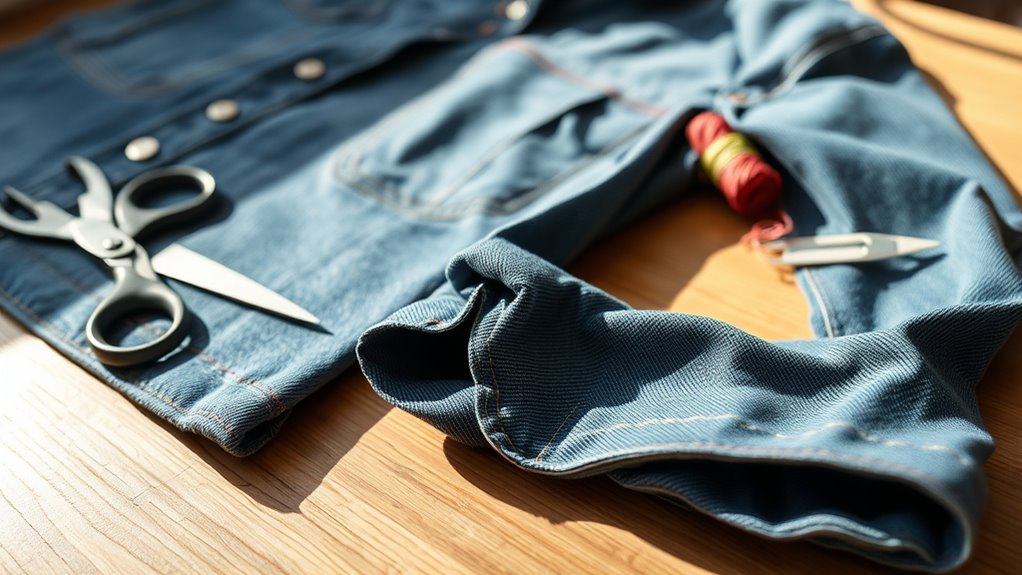
Repairing Tears and Holes in Clothing
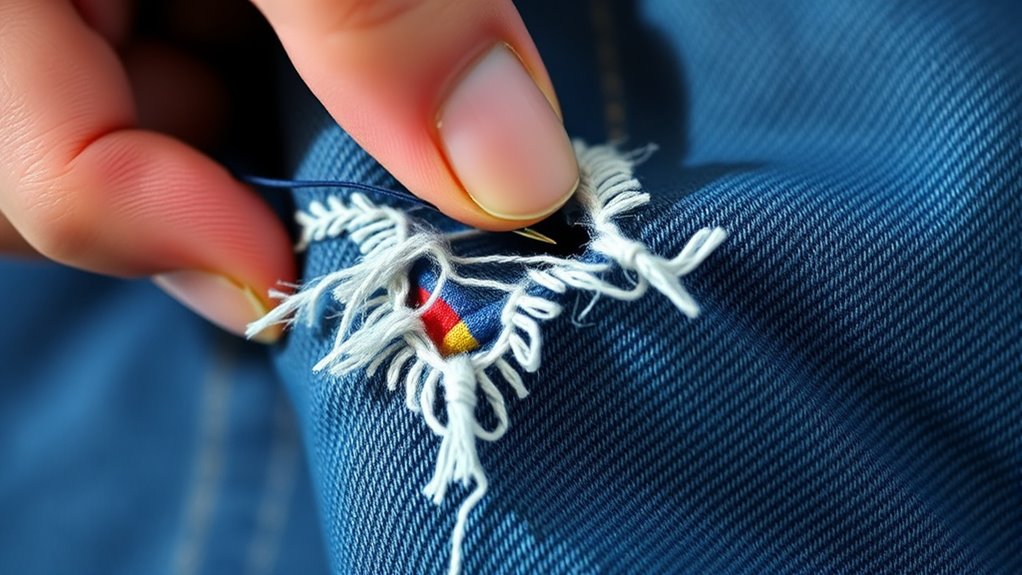
Repairing tears and holes in clothing can be straightforward if you approach them with the right techniques. First, assess the damage: small tears might only need a quick stitch, while larger holes may require patching. For minor tears, turn the garment inside out, and sew the edges together with a simple backstitch or whipstitch. Use matching thread for a seamless look. For larger holes, cut a fabric patch slightly bigger than the hole, and sew it on the inside of the garment with a zigzag stitch. Make sure to secure all edges well to prevent further tearing. Take your time to ensure stitches are tight and even. With patience and the right tools, you can mend tears and holes effectively, extending your clothing’s lifespan. Incorporating proper repair techniques can also help maintain the garment’s original appearance and durability. Additionally, understanding fabric types can guide you in choosing the most effective repair method for each garment. Knowing the safety standards of your repair materials can ensure that your repairs are long-lasting and safe to wear. Using appropriate tools, such as small scissors or a sewing machine, can make the repair process more precise and efficient. Moreover, practicing these skills regularly can boost your confidence in performing DIY clothing repairs, leading to less waste and more sustainable clothing habits.
Amazon Product B0DBQ4JX85
As an affiliate, we earn on qualifying purchases.
Replacing Missing or Broken Buttons

Missing or broken buttons can easily be replaced at home with a few simple steps. First, find a matching button or get one that complements your garment. Use a needle and thread, preferably matching the original color, to sew the new button in place. Secure the button with several stitches, making sure it’s firmly attached. If the original button has shank holes, pass the thread through multiple times to strengthen the attachment. For buttons with shanks, sew through the shank to keep the button elevated. Once sewn securely, tie off the thread tightly and trim any excess. Test the button by gently tugging to ensure it stays in place. With just a little effort, you can restore your garment’s functionality and appearance quickly.
Patching and Reinforcing Worn Areas
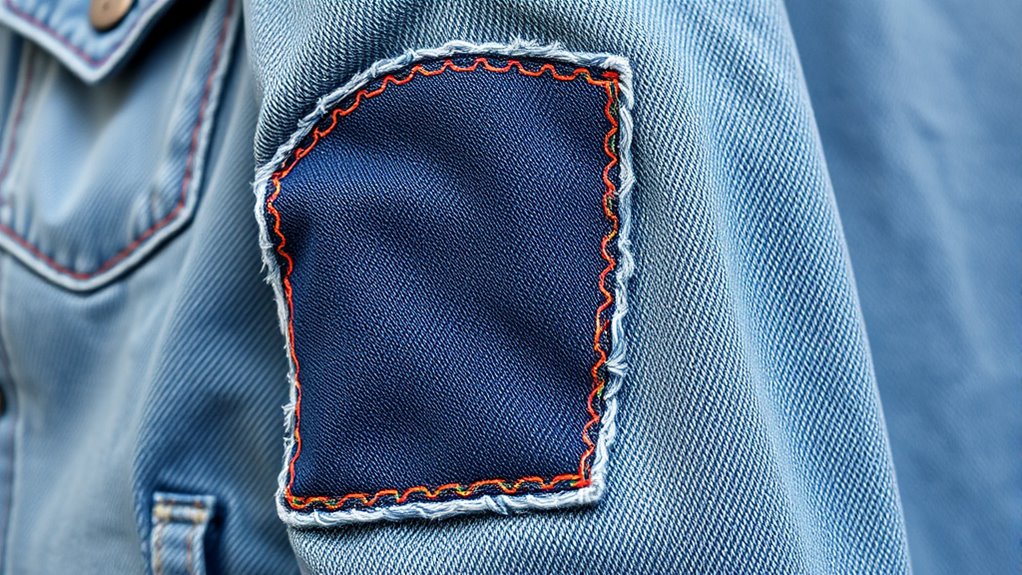
When you notice areas of wear or holes in your clothing, reinforcing or patching them promptly can extend the garment’s life. Start by cleaning the area thoroughly to guarantee proper adhesion. For small holes or thin fabric, use iron-on patches or fusible interfacing on the inside. For larger worn spots, cut a fabric patch slightly bigger than the damage and sew or glue it on the inside for extra durability. Reinforcing seams or frayed edges with zigzag stitches or fabric glue helps prevent further tearing. Choose a fabric that matches your garment’s material for a seamless look. Incorporating advancements in fabric repair technology can make the process even more effective. Utilizing fabric adhesives can provide a strong, flexible bond that withstands washing and wear. Additionally, selecting appropriate patching techniques based on fabric type ensures a more durable repair. Employing proper preparation and technique during the repair process can also improve the overall longevity of the fix. Exploring innovative repair methods used in pinball machines can inspire creative solutions for fabric repairs as well. Taking these simple steps quickly keeps your clothes wearable longer and saves you money, all while reducing waste.
Fixing Zippers and Fastenings
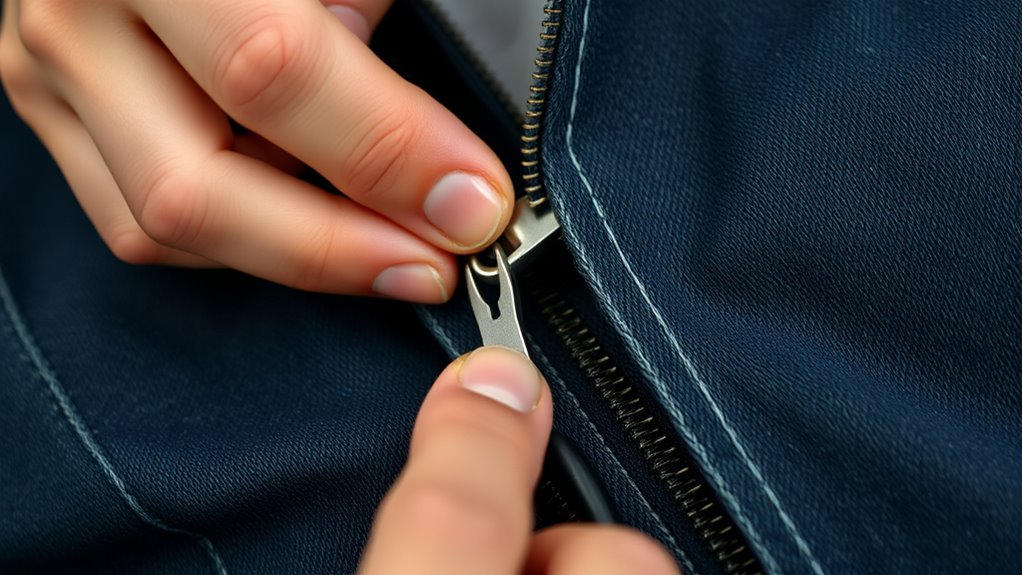
A broken or stuck zipper can quickly turn a functional garment into an inconvenience. To fix it, first check if the zipper slider is misaligned or loose. If it’s misaligned, gently move it back into place using pliers. For a loose slider, squeeze it slightly with pliers to tighten the grip on the teeth. If the zipper is stuck, examine for fabric caught in the teeth and carefully remove it. Sometimes, dirt or debris causes the issue—clean the teeth with a toothbrush and soapy water. Applying a small amount of lubricant like soap, wax, or graphite can help it glide smoothly. For better results, using appropriate lubricants designed for zippers can reduce wear and improve operation. If the zipper is beyond repair, replacing the entire zipper might be necessary. With patience and the right tools, fixing zippers becomes a manageable, cost-effective task. Check local support hours if you need professional assistance with complex repairs.
Altering Garments for Better Fit and Style

Altered garments to improve their fit and style is a practical way to refresh your wardrobe without buying new pieces. You can take in a too-loose dress, shorten pants, or add decorative touches to update the look. Start by trying on the item and pinning or marking where adjustments are needed. Use a sewing machine or hand-stitch for quick changes, focusing on seams, darts, or hems. For a more modern style, consider adding details like new buttons, trims, or embroidery. Altering your clothes not only saves money but also allows you to customize your wardrobe to suit your taste. With some basic sewing skills, you can transform off-the-rack pieces into perfect-fitting, stylish garments that reflect your personality.
Using Fabric Glue and Iron-On Patches for Quick Fixes
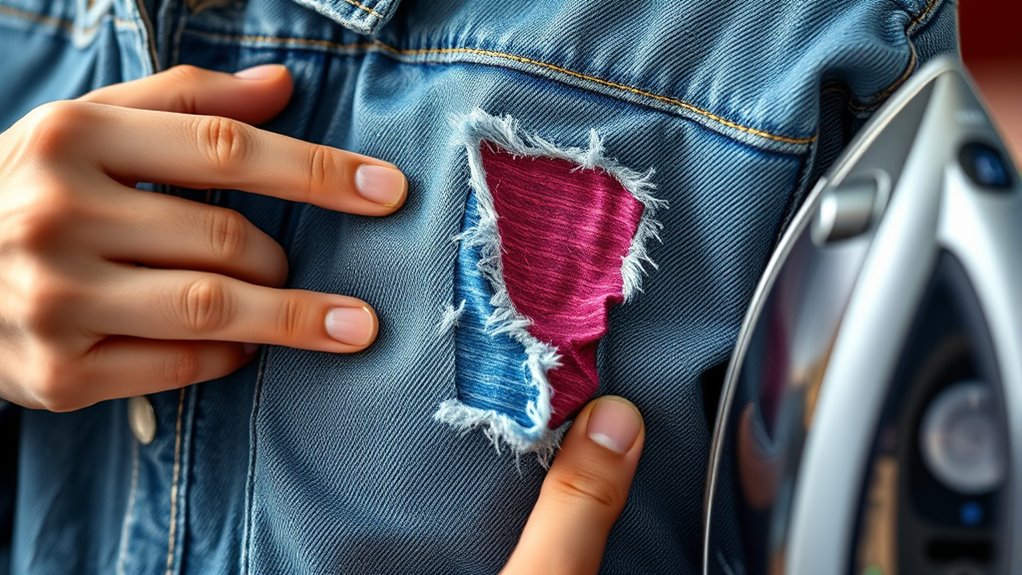
Fabric glue and iron-on patches offer quick, no-sew solutions for repairing clothing without needing a sewing machine. Fabric glue is ideal for small rips, frayed edges, or attaching embellishments. Just apply a thin layer of glue along the tear or area needing reinforcement, press firmly, and let it dry. Iron-on patches are perfect for larger holes or worn spots. Place the patch over the damage, cover it with a cloth, and press with a hot iron for about 30 seconds. This creates a strong bond without sewing. Both methods save time and effort, making repairs simple and accessible. Keep in mind, these fixes are best for temporary or casual repairs, but they can extend the life of your garments until you’re ready for a more permanent fix.
Maintaining and Caring for Repaired Clothing

To make sure your repaired clothing stays in good condition, it’s essential to follow proper care practices. Proper maintenance helps your repairs last longer and keeps your garments looking their best.
Proper care extends your clothing repairs, keeping garments looking their best longer.
Here are three tips to keep in mind:
- Wash gently: Use cold water and a delicate cycle to prevent stress on the repaired area.
- Avoid harsh detergents: Opt for mild detergents that won’t weaken the fabric or adhesive used in repairs.
- Air dry whenever possible: Hang your clothing to dry instead of using high heat in the dryer, which can damage repairs or cause new tears.
Following these steps ensures your efforts in fixing your clothes pay off and your wardrobe remains durable and fresh.
Frequently Asked Questions
What Are the Best Tools for Beginners in Clothing Repair?
When starting with clothing repair, you want simple, versatile tools. A good sewing kit with needles, colorful threads, and scissors is essential. You might also need a seam ripper for undoing stitches and a fabric glue for quick fixes. These basic tools help you tackle common issues like tears or loose hems. With patience and practice, you’ll become more confident in repairing your clothes and extending their lifespan.
How Do I Choose the Right Fabric for Patches?
Think of choosing fabric for patches like selecting a sidekick in a hero story. You want something that matches in durability, texture, and color. Check your garment’s fabric type and choose a patch that complements it—like cotton on cotton or denim on denim. Consider the patch’s purpose; for reinforcement, pick sturdy fabric, and for decoration, go for something eye-catching. Trust your instincts, and you’ll find the perfect match!
Can DIY Repairs Affect the Resale Value of Clothing?
Your DIY repairs can influence your clothing’s resale value, depending on their quality and visibility. If repairs are neat and discreet, they might not hurt the item’s worth and could even showcase your skills. However, obvious or poorly done fixes could lower its appeal to buyers. You should guarantee repairs are professional-looking to maintain or boost your resale value, making the garment more attractive and trustworthy to potential buyers.
What Safety Precautions Should I Take When Using Sewing Machines?
When using sewing machines, you should always prioritize safety. Keep your fingers away from the needle, and never operate the machine while distracted. Use the presser foot and needle guard, and make sure the machine is unplugged when threading or changing parts. Wear eye protection if needed, and keep your workspace clean and well-lit. Follow the manufacturer’s instructions carefully to prevent accidents and ensure safe, effective sewing.
How Do I Troubleshoot Uneven or Puckered Seams?
When you notice uneven or puckered seams, first check your thread tension and adjust it if needed. Make sure you’re using the correct needle and thread for your fabric. Sew slowly, especially around curves, and smooth out the fabric as you go. Also, verify your fabric is properly aligned before sewing. These steps help create even, professional-looking seams and prevent puckering.
Conclusion
By mastering these DIY repair skills, you not only save money but also reduce waste—supporting a more sustainable world. Notably, some studies suggest that repairing clothing can actually make garments last longer than buying new ones. So, next time you spot a tear or missing button, remember that a little effort can breathe new life into your wardrobe and help protect the environment. Keep practicing, and you’ll turn mending into a rewarding habit.